Steps to Install & Setup
Shopify Connector by Microsoft

Are you ready to unlock the potential of seamless integration between your Shopify online store and Microsoft Dynamics 365 Business Central ERP system?
In the last article, we looked at an overview of Microsoft’s Shopify Connector.
In this article, we will walk you through the process of installing and configuring Microsoft’s Shopify Connector for Business Central. This powerful tool will enable you to streamline your eCommerce operations, automate data synchronization, and optimize your business for growth and success.
Get ready to take your online business to new heights with this easy-to-follow guide.
1. Install Shopify Connector
Microsoft’s Shopify Connector for Business Central comes pre-installed in Business Central for all new customers. Existing Business Central customers can download and install the extension directly from Microsoft AppSource.
You can download the Shopify Connector for Business Central from Microsoft AppSource.
2. Steps to Install Microsoft’s Shopify Connector for Business Central
2.1. Install Shopify Extension in Business Central
Step 1: Go to your Business Central sandbox account and search for Extension Management.
Step 2: Click on Extension Management. It will take you to Installed Extension page in Business Central.
Step 3: Click on Search button and search for Shopify Connector.
Step 4: Install the Shopify Connector extension.
2.2. Install Business Central App in Shopify
Step 1: Go to the Shopify Settings à Apps and sales channels à Shopify App store as shown below.
Step 2: Search for Dynamics 365 Business Central App and Click on Install.
Step 3: Next click on Install app.
Step 4: After installing the app, click on Sign in to authenticate your Business Central account.
2.3. Connect Business Central with Shopify Store
Step 1: After the Shopify Connector is installed, search for Shopify Connector Setup page in Business Central. Click on Shopify Connector Setup to access the setup page.
Step 2: Click on Next button, accept the Terms and Conditions, and click Next again.
Step 3: Enter the Shop URL and Click Next.
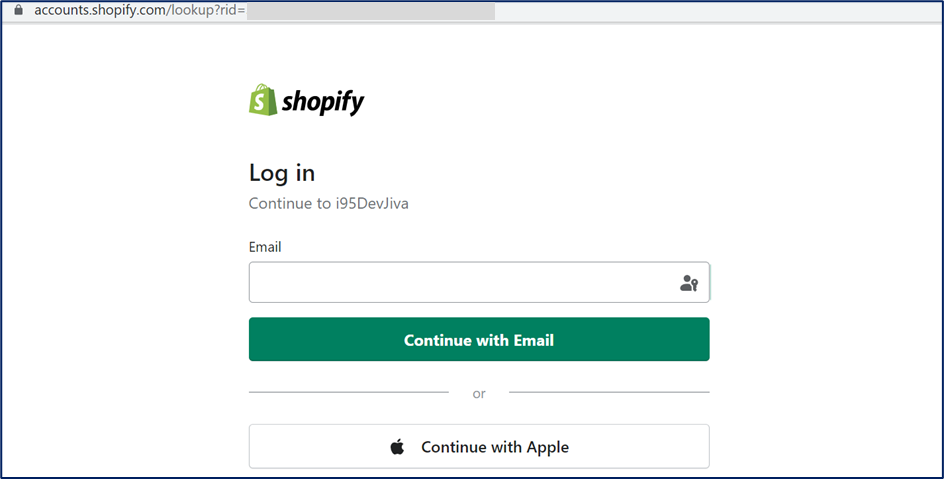
Step 4: It will redirect you to Shopify authentication page. Enter the required credentials.
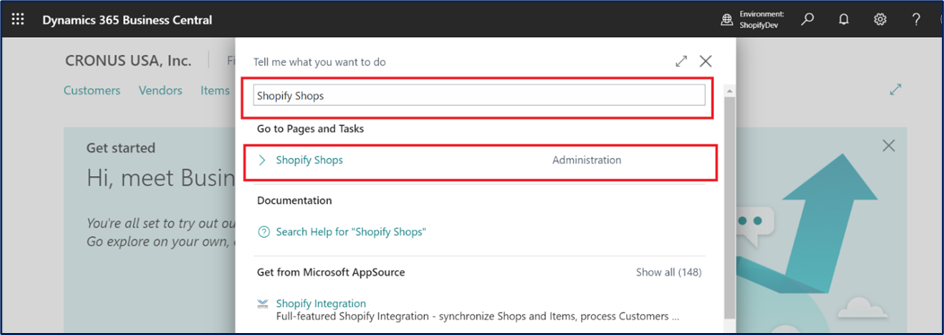
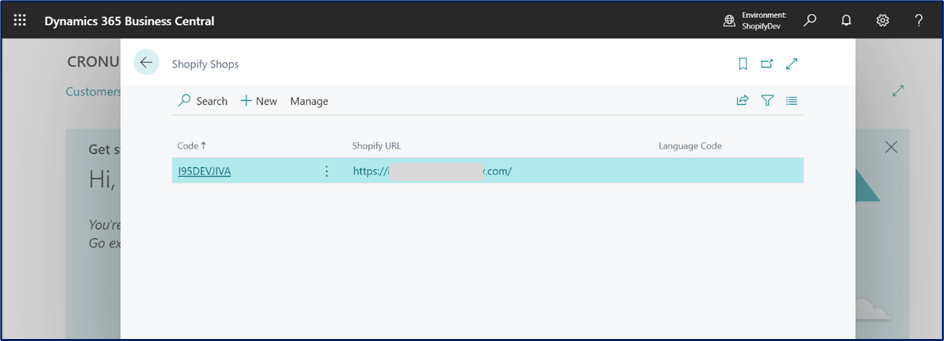
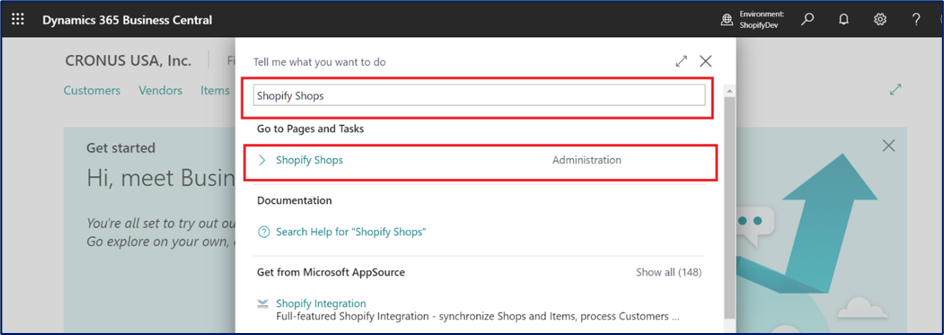
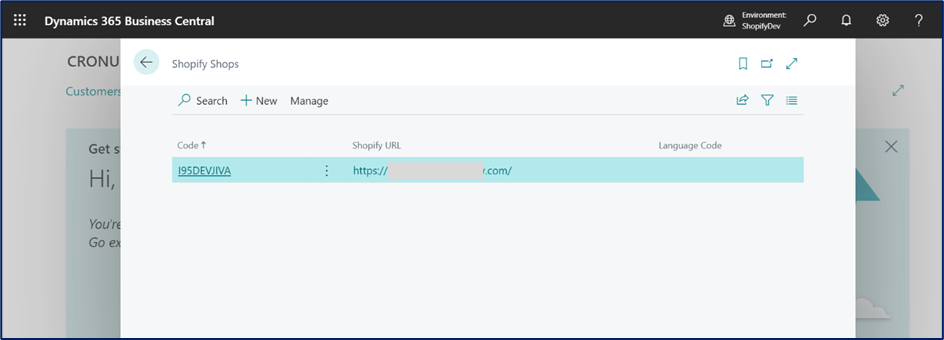
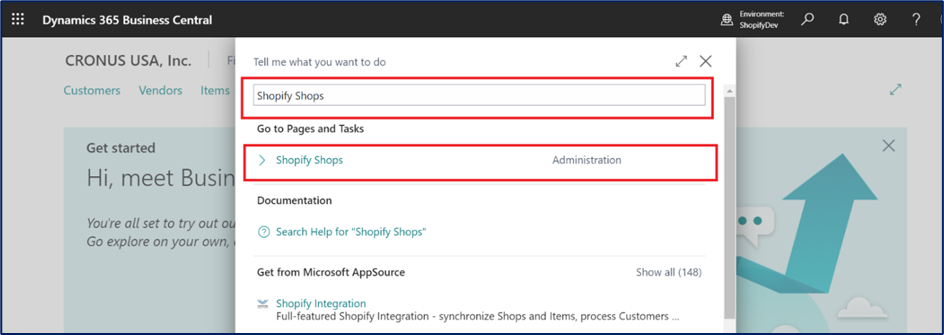
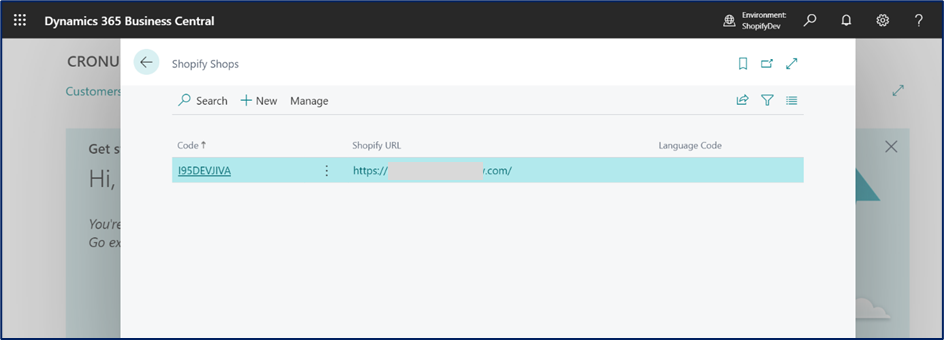
Step 5: Once the Authentication is completed, a Shopify configuration file is created with the Shopify store url. To check the configuration file, navigate to Business Central home page and search for Shopify Shops in Tell Me. Select Shopify Shops to validate.
3. Configure Shopify Shops in Business Central
To configure the Shopify Shops in Business Central, search for Shopify Shops in Tell me.
Step 1: Click on New and enter the Shopify details in the Card as shown below.
Step 2: Click on shop’s code to access Shopify Store Configuration. In the Configuration screen, you can enable/ disable the shop and configure Item/ Product, Customer, and Order information sync.
3.1. Schedulers
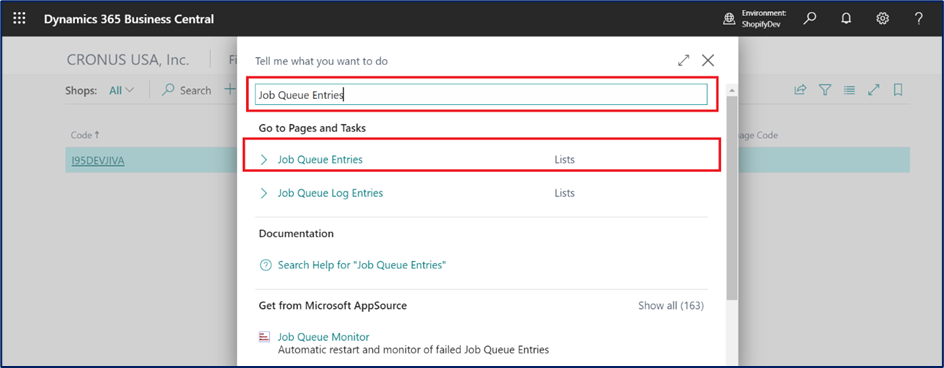
Step 1: Microsoft’s Shopify Connector uses Job Queues to make integration work. To view the list of Job Queues used, search and select Job Queue Entries in the Tell Me.
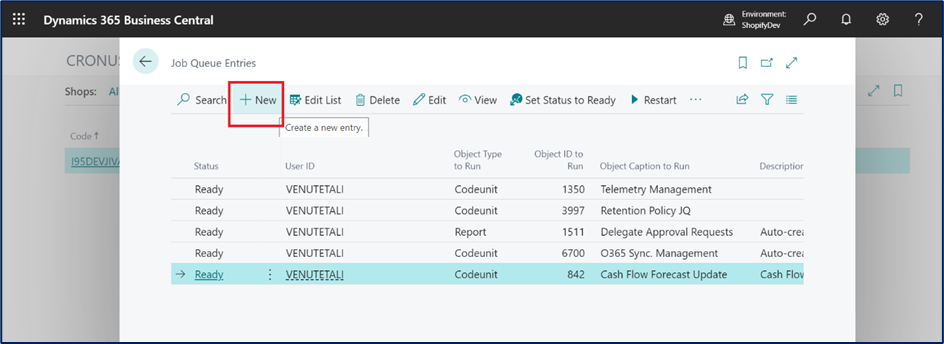
Step 2: In the Job Queue Entries page click on New.
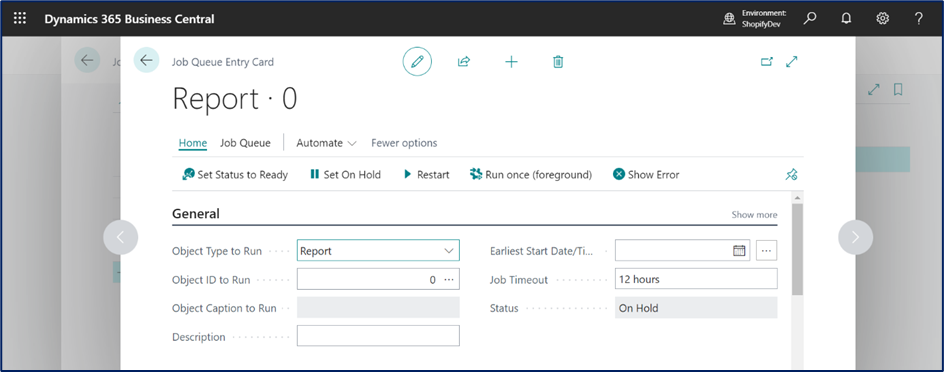
Step 3: In the Job Queue Entry card page displayed, enter the required details.
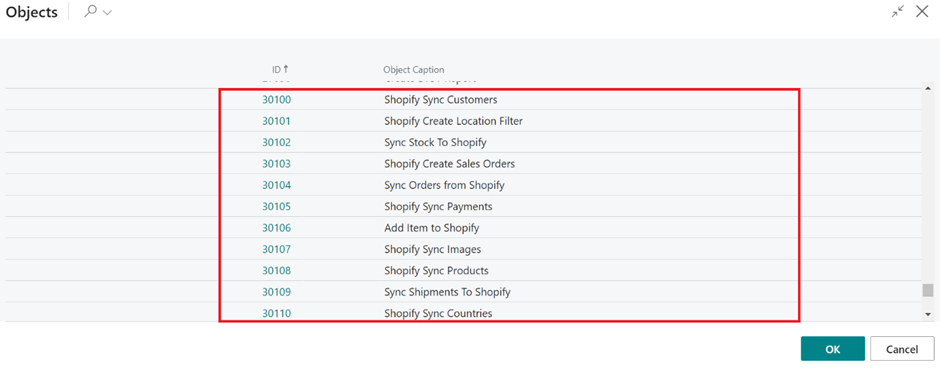
Click on the filed associated with Object Id to Run to view the list of available jobs that Shopify Connect uses to synchronize data between Shopify and Business Central.
3.2. Shipping Method Mapping
Step 1: Search for Shopify Shops in Tell Me and select it. Click on shop’s Code to view the Shopify Store configuration.
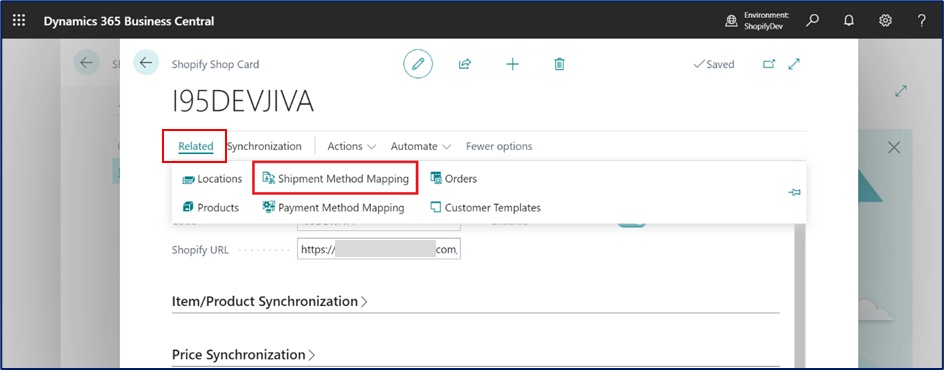
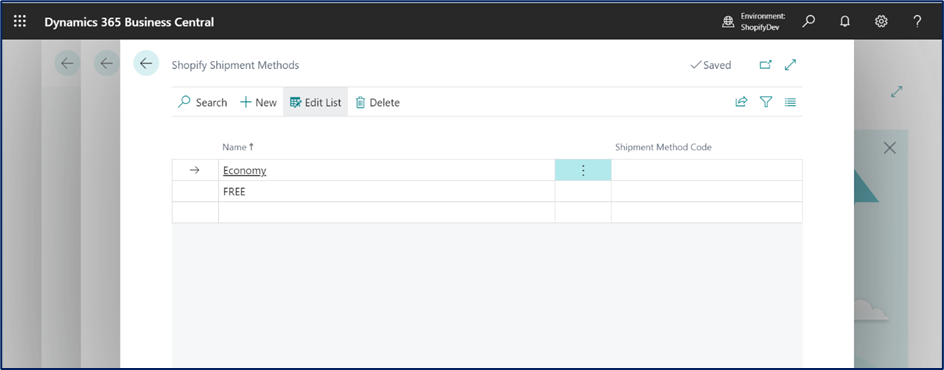
Step 2: In the Shopify Store Configuration page, click on Related button and select Shipment Method Mapping.
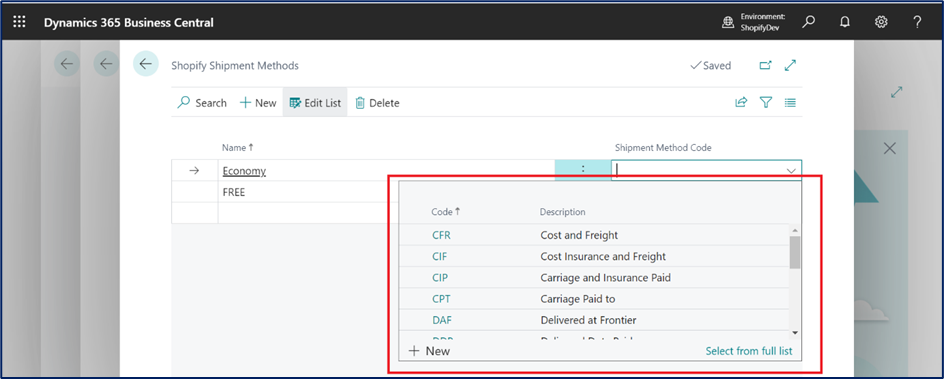
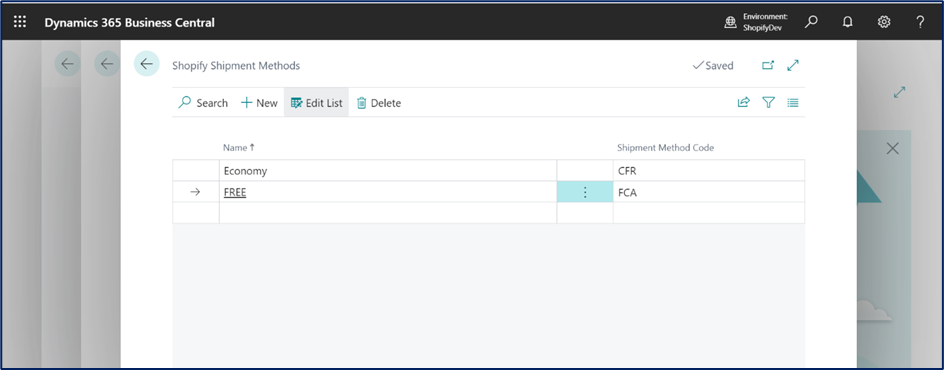
Step 3: The Shipping Method Mapping page will display the list of Shipping methods configured in Shopify (if the authentication was successful). Shipping Method Code contains the list of all methods configured in BC. Map the Shopify shipping methods with the methods in Business Central.
3.3. Payment Method Mapping
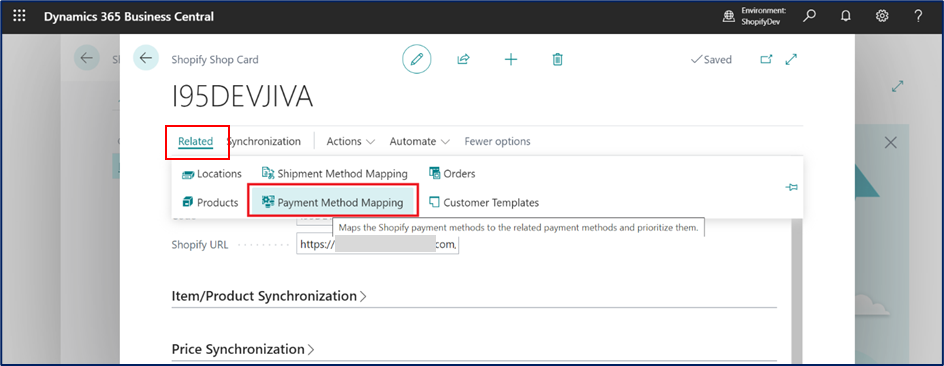
Step 1: Search for Shopify Shops in Tell Me and select it. Click on shop’s Code to view the Shopify Store configuration.
Step 2: In the Shopify Store Configuration page, click on Related button and select Payment Method Mapping.
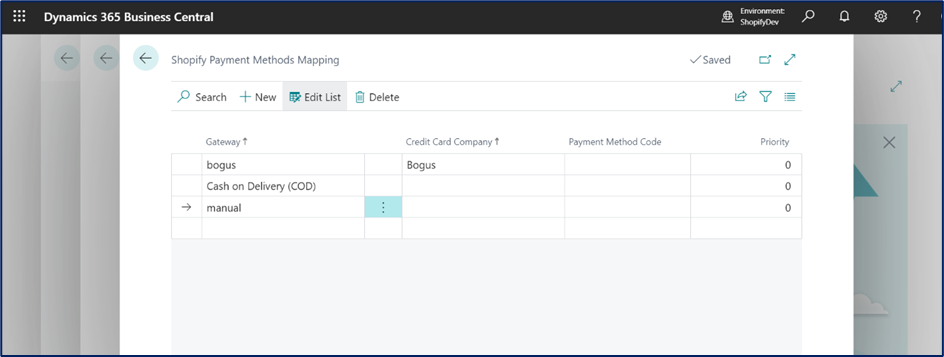
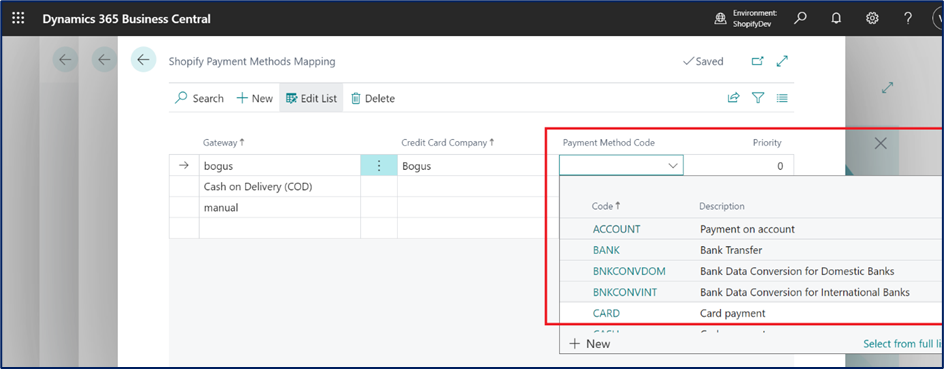
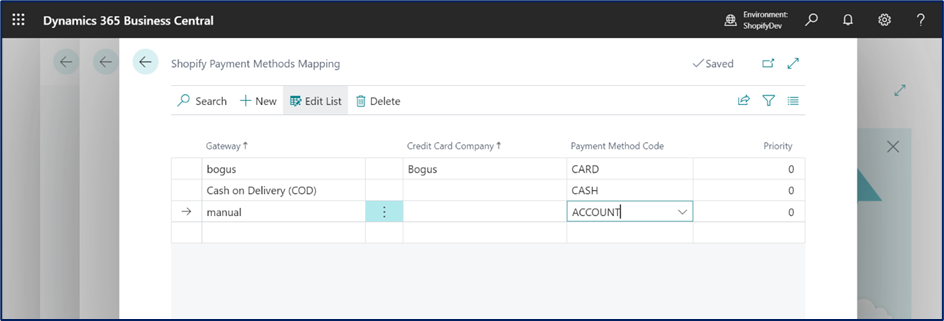
Step 3: The Payment Method Mapping page will display the list of Payment methods configured in Shopify (if the authentication was successful). Payment Method Code contains the list of all methods configured in BC. Map the Shopify payment methods with the methods in Business Central.
3.4. Product/ Item Synchronization
Search for Shopify Shops in Tell Me and select it. Click on shop’s Code to view the Shopify Store configuration.
In the Shopify Store Configuration page, click on Sync button and select the required option. The following table outlines the available options.
| Option | Description |
|---|---|
| Blank |
|
| To Shopify |
|
| From Shopify |
|
First, import items either in bulk or together with orders to add them to the Shopify Product and Shopify Variant tables. Then map imported products and variants to items and variants in Business Central. Manage the process using the following settings:
| Field | Description |
|---|---|
| Auto create unknown items |
|
| Item Template Code |
|
| SKU Mapping |
|
| SKU Field Separator |
|
| Variant Prefix |
|
| Shopify Can Update Item |
|
3.5. Customer Synchronization
The customer information is essential to process orders in Business Central. When orders are synced from Shopify to Business Central, there are two options that are available to enable that:
- Use a special customer for all orders.
- Sync the customer information from Shopify to Business Central. This option is also available when you sync customers from Business Central to Shopify.
| Field | Description |
|---|---|
| Customer Import from Shopify |
|
| Customer Mapping Type |
Define how you want the connector to perform the mapping.
|
| Shopify Can Update Customers |
|
| Auto Create Unknown Customers |
|
| Customer Template Code |
|
3.6. Order Synchronization
- A regular Shopify order can include costs in addition to the subtotal, such as shipping charges or, if enabled, tips. These amounts are posted directly to the G/L account you want used for specific transaction types:
- Shipping Charges Account
- Sold Gift Card Account; learn more at Gift Card
- Tip account
- Enable Auto Create Orders to automatically create sales documents in Business Central once the Shopify order is imported.
- If you want to automatically release a sales document, turn on the Auto Release Sales Order toggle.
- Enter a currency code if your online shop uses a different currency than the local currency (LCY).
- The specified currency must have exchange rates configured. If your online shop uses the same currency as Business Central, leave the field empty.
- You can see Store Currency in the Store details settings in your Shopify Admin. Shopify can be configured to accept different currencies, however imported orders into Business Central use store currency.
3.7. Dashboard
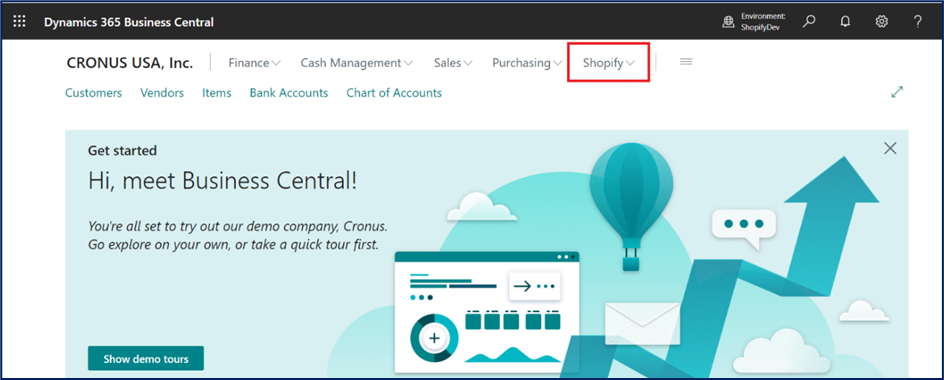
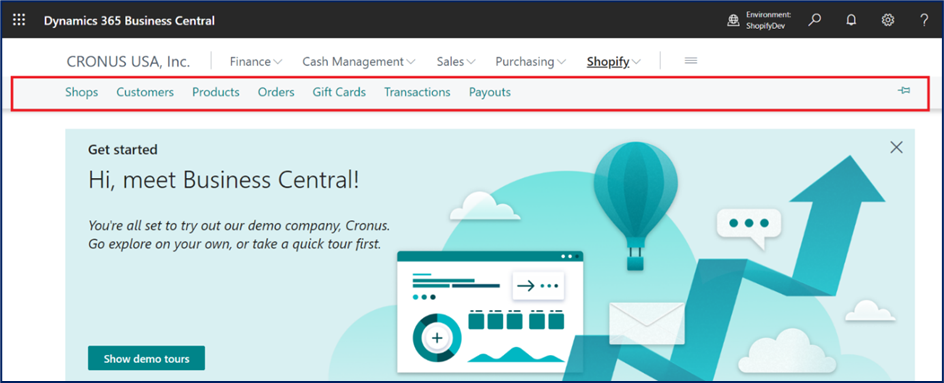
Step1: Navigate to home page in Business Central and click on Shopify in top navigation. This will display the available options as shown in the screenshot below.
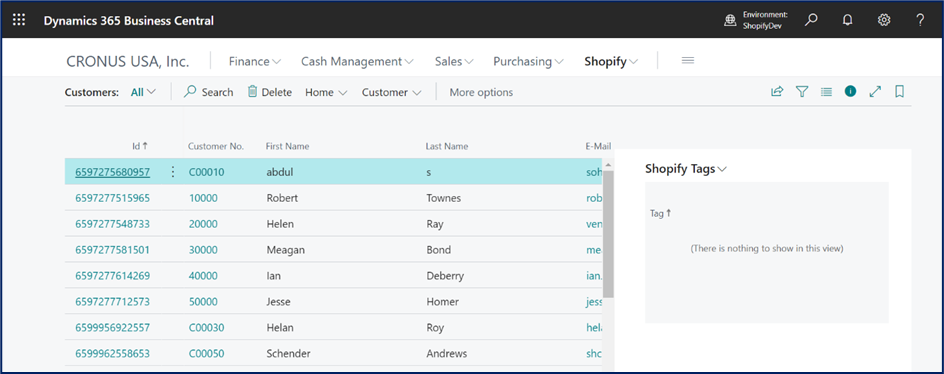
Step 2: Click on Customers to view the customer details created from Shopify. Similarly, the details can be viewed for Products, Orders, and other entities.
Congratulations! You have successfully installed Microsoft’s Shopify Connector. Your business is now equipped with an integration that bridges the gap between your Shopify online store and Microsoft Dynamics 365 Business Central ERP system.
With the integration in place, you can now focus on what truly matters – delivering exceptional customer experiences, making data-driven decisions, and scaling your business to new heights. Empower your team, reduce manual efforts, and stay ahead of the competition in the ever-evolving world of eCommerce.
If you need any help, don’t hesitate to reach out to us and we will take care of everything for you.
Get ready to embrace the power of integration and explore the endless possibilities it brings to your business. The future of your business starts here!


